Wazuh File Integrity Monitoring: Step-by-Step Guide

Wazuh File Integrity Monitoring
Before jumping into the configuration, it is essential to understand what makes FIM a foundational pillar of modern cybersecurity infrastructure.
In a standard enterprise network, thousands of files are accessed and modified daily. However, critical system files, application configurations, and sensitive data directories should rarely change. When an attacker successfully breaches a system, one of their primary objectives is to establish persistence, escalate privileges, or modify logs to hide their tracks. They often achieve this by altering binaries or injecting malicious code into trusted files.
What We Will Build in This Guide
In this step-by-step tutorial, we are setting up a practical lab to demonstrate Wazuh's FIM capabilities. We will cover:
Locating and editing the Wazuh agent configuration file.
Targeting a specific directory for monitoring.
Enabling real-time alerts and content-change tracking.
Testing the setup by simulating an unauthorized change.
Analyzing the generated security events directly from the Wazuh Dashboard.
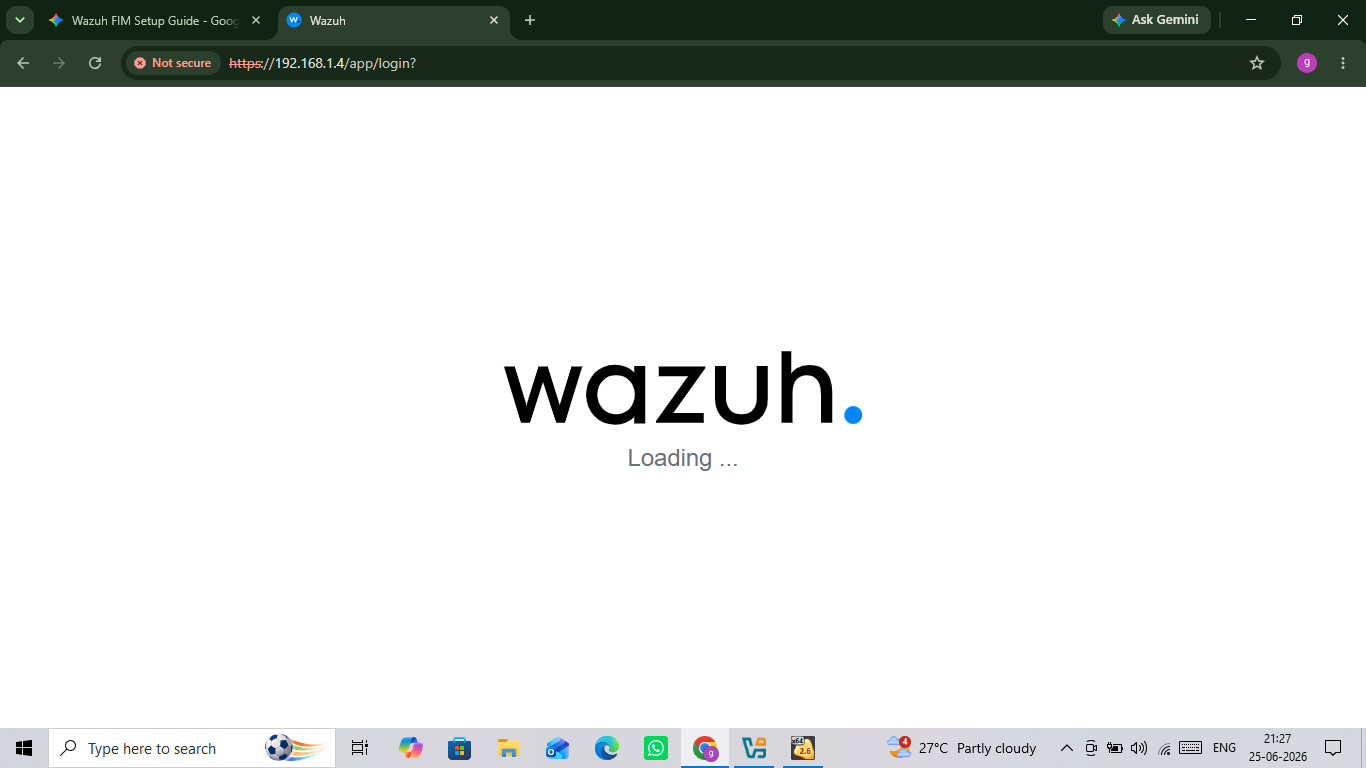
Step 1: Accessing the Web Interface
Open your preferred web browser and navigate to your Wazuh server's IP address (e.g., https://<YOUR_WAZUH_SERVER_IP>). Wait for the web user interface loading screen to complete before logging in with your administrator credentials.
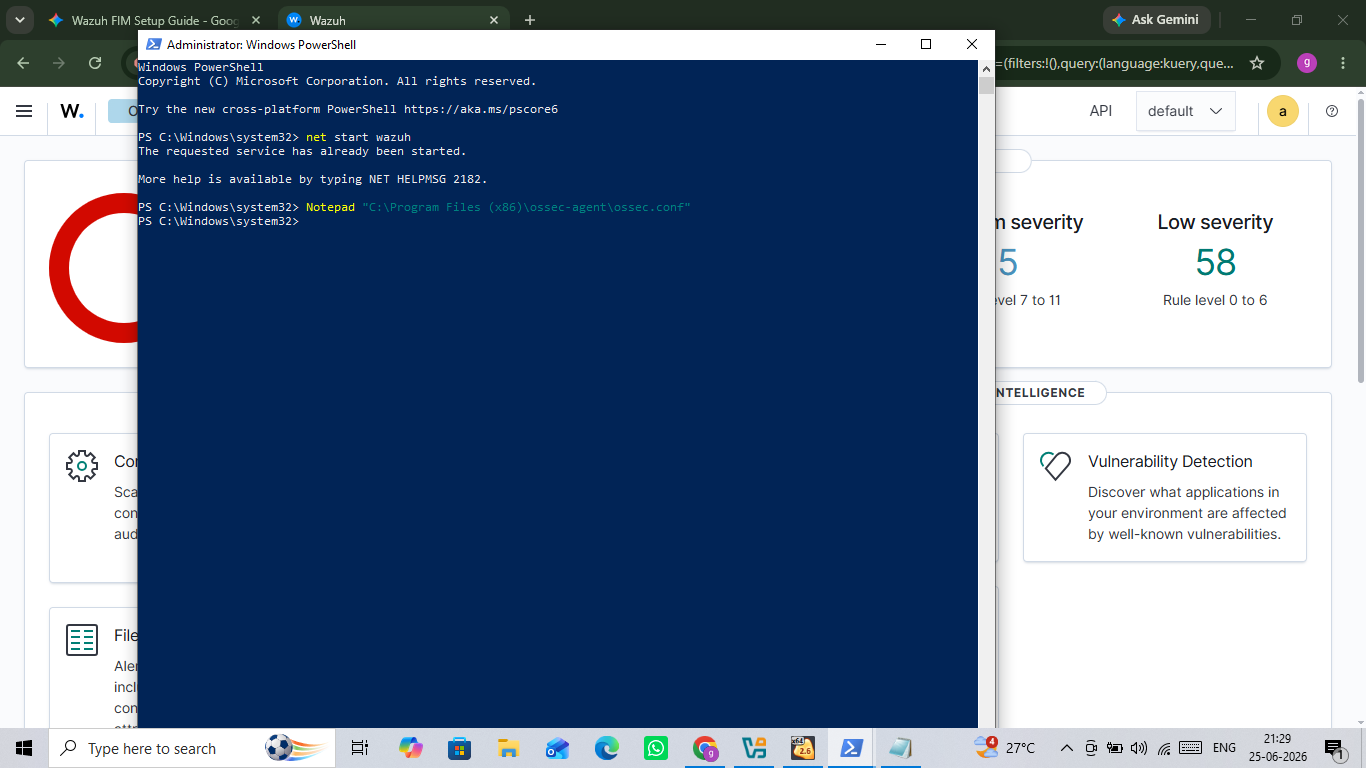
Step 2: Opening the Agent Configuration File
Open Windows PowerShell as an Administrator on your target endpoint. Run the following command to open the main configuration file (ossec.conf) in Notepad for editing:
Notepad "C:\Program Files (x86)\ossec-agent\ossec.conf"
Step 3: Restarting the Wazuh Agent Service
After saving your directory modifications inside the configuration file, apply the changes by restarting the Wazuh agent service. Run the following command in your administrative PowerShell window:
PowerShell
Restart-Service -Name wazuh

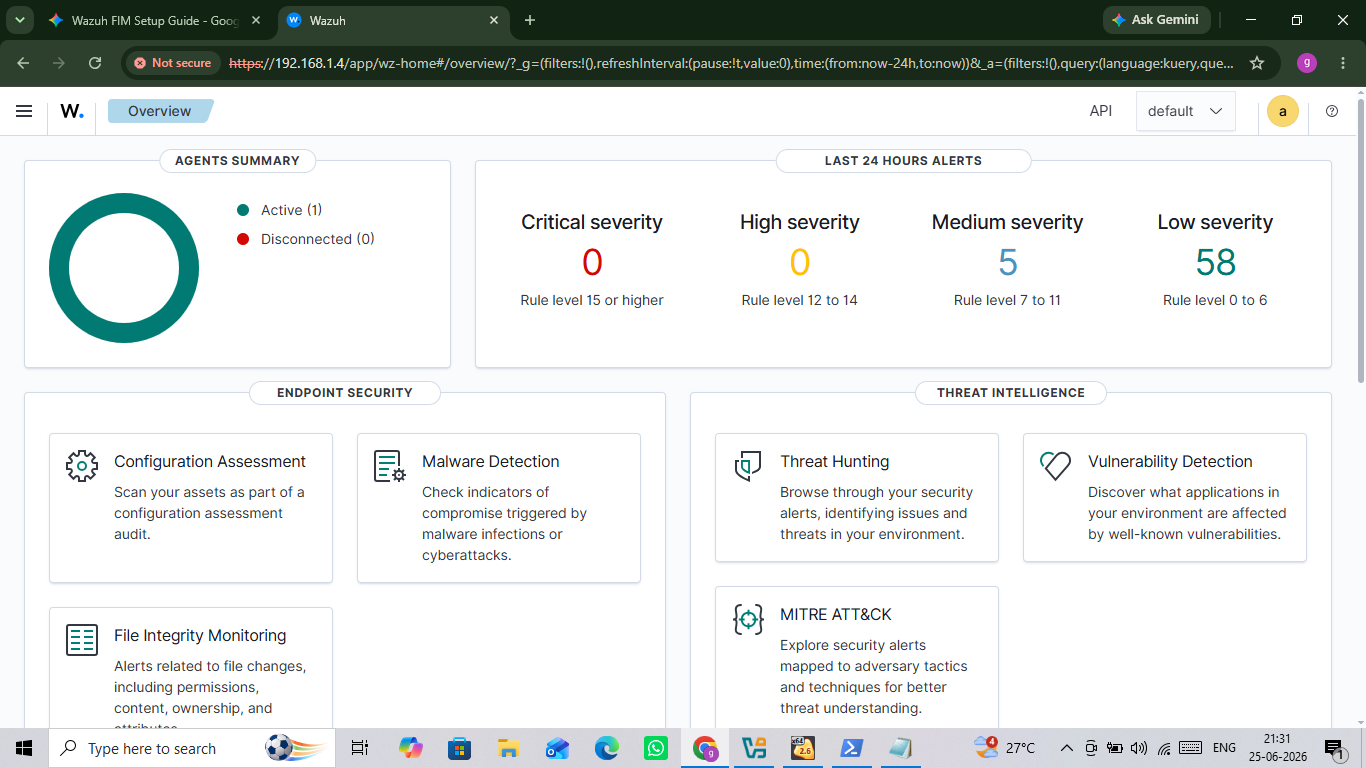
Step 4: Navigating to the FIM Module
Return to your Wazuh Dashboard main overview screen. Under the Endpoint Security section on the bottom left, locate and click on the File Integrity Monitoring card to view the dedicated FIM alerts, tracking metrics, and integrity event summaries.
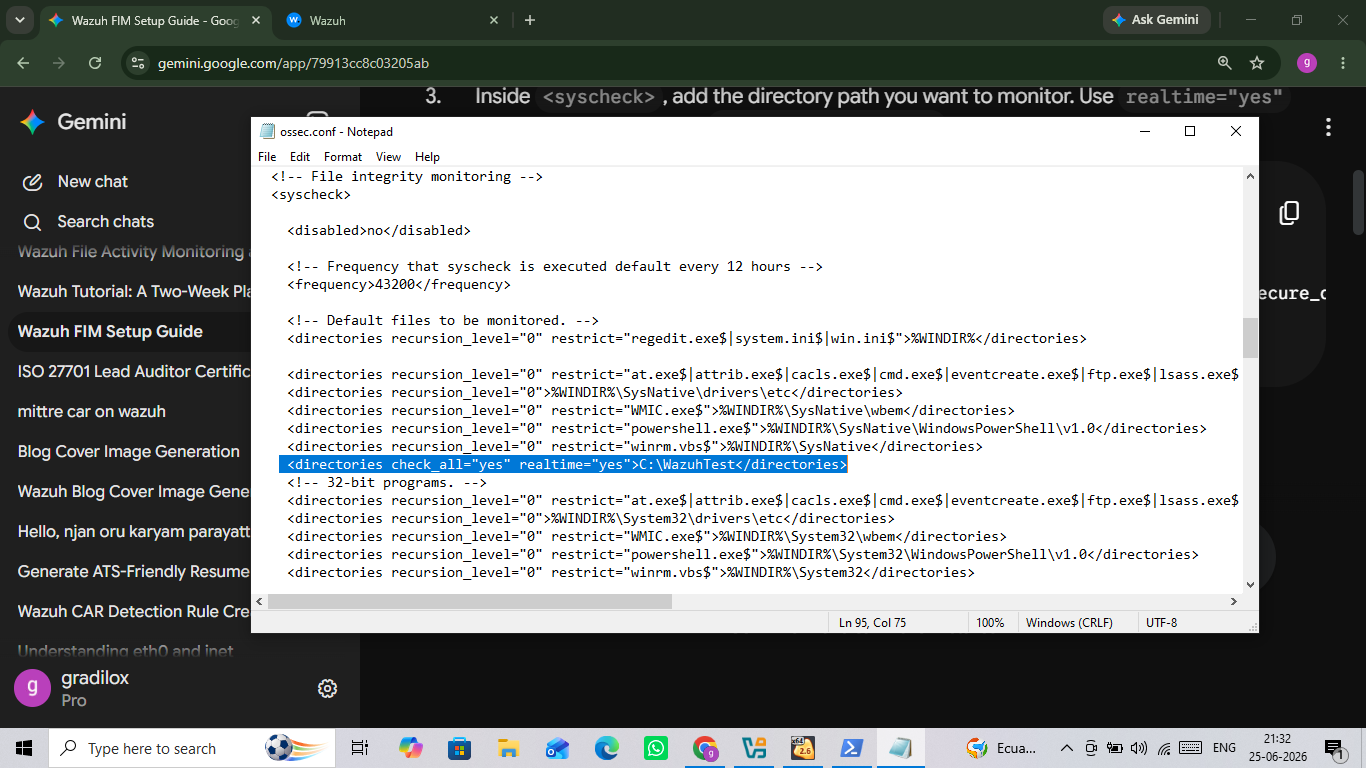
Step 5: Configuring Monitored Directories
Inside the ossec.conf file, find the <syscheck> section and add the target path you want to monitor. As highlighted, adding
<directories check_all="yes" realtime="yes">C:\WazuhTest</directories>configures the agent to monitor that specific directory for any modifications in real-time. Save the file when finished.
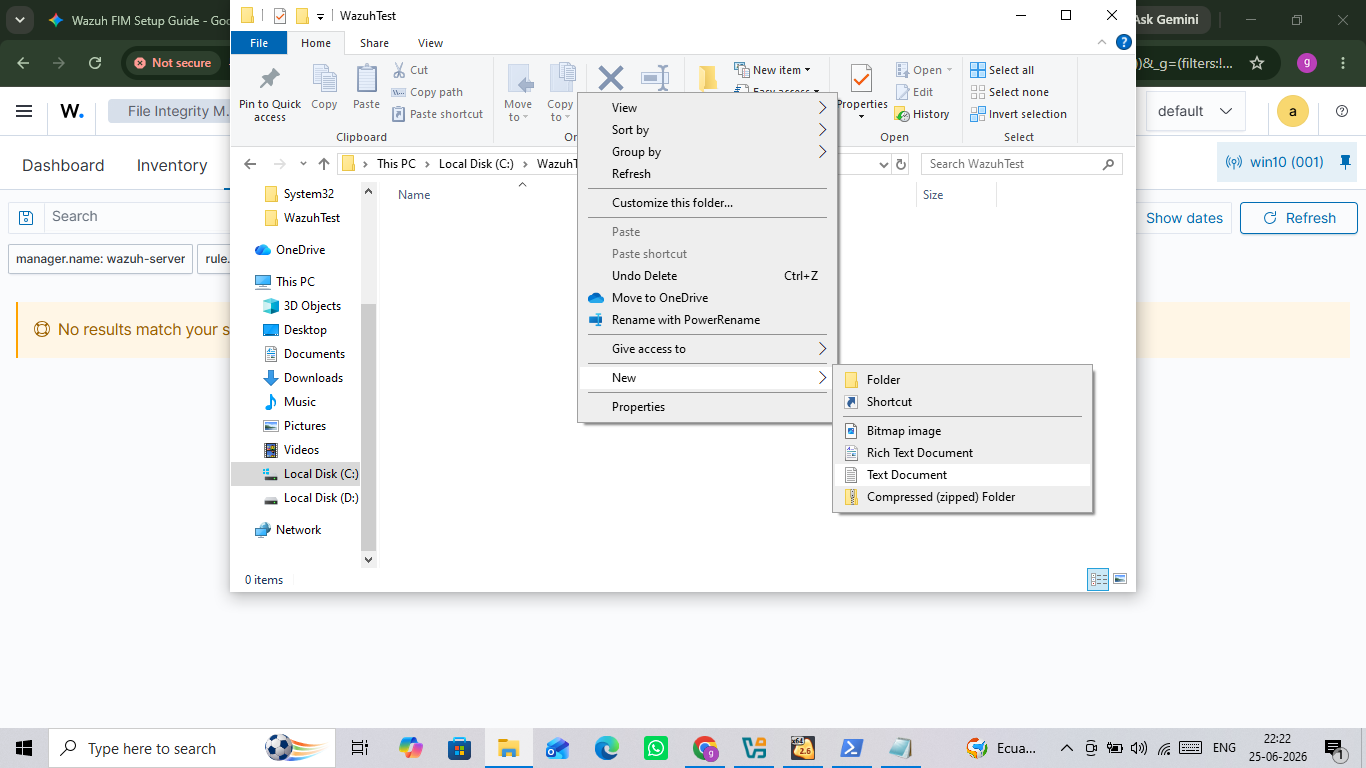
Step 6: Simulating a File Integrity Event
Navigate to your newly monitored folder (C:\WazuhTest). Right-click inside the directory, hover over New, and select Text Document to create a test file. This action will immediately trigger a real-time file creation event to test your Wazuh configuration.
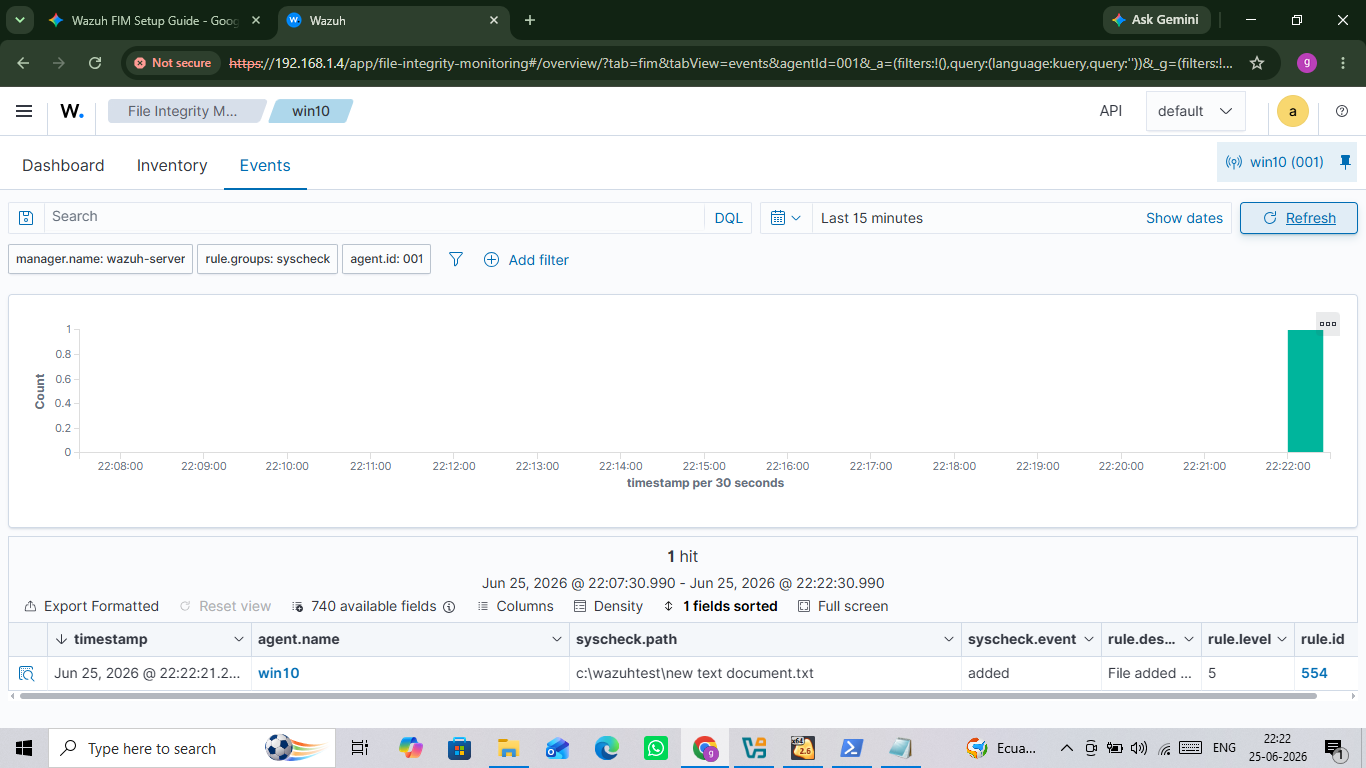
Step 7: Verifying File Creation Alerts
Navigate to the Events tab within the FIM module to see incoming alerts. As shown in Screenshot (523).png, the dashboard successfully captures the file creation event with Rule ID 554 ("File added to the system") pointing directly to the path c:\wazuhtest\new text document.txt.
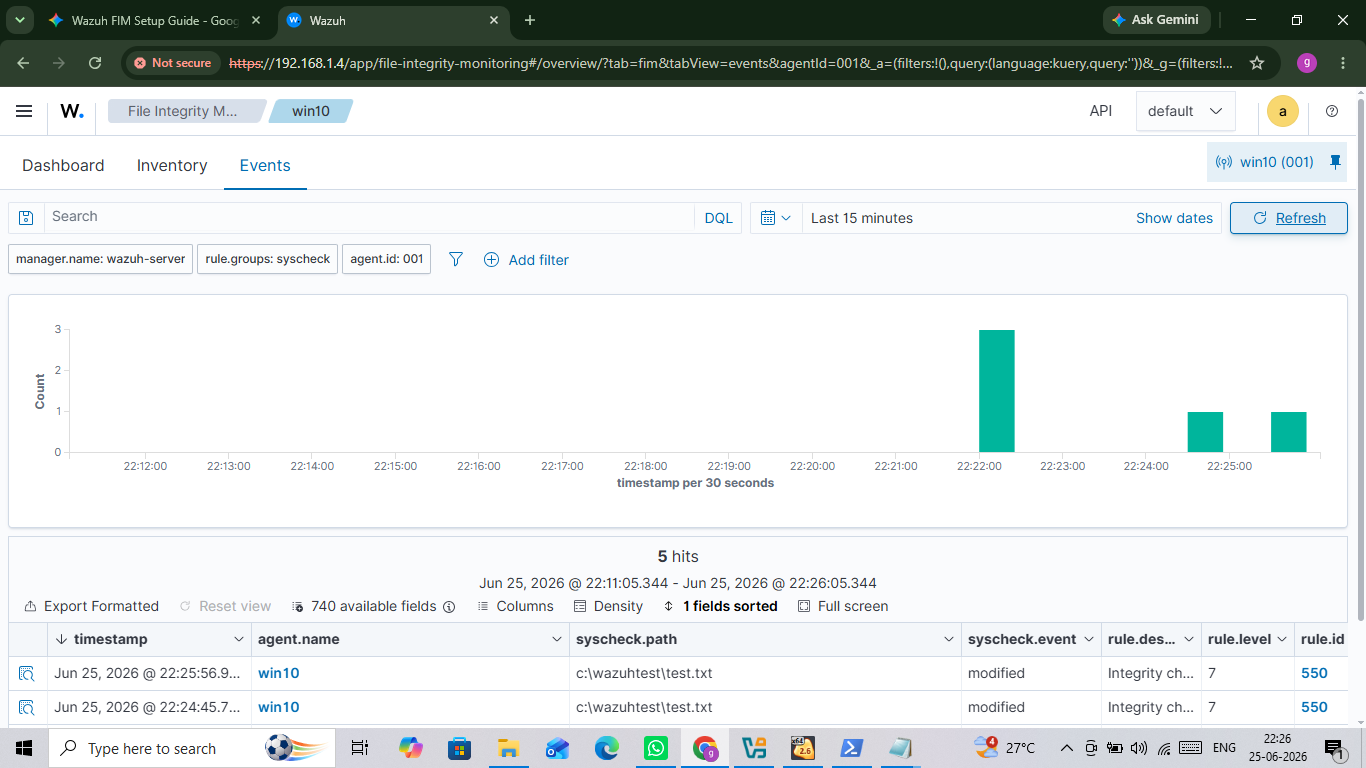
Step 8: Monitoring File Modifications
If a monitored file is altered, Wazuh generates a higher severity alert. As observed in Screenshot (524).png, modifying the text inside test.txt triggers Rule ID 550 ("Integrity checksum changed"), providing a clear timeline of file tampering events under the syscheck.path details.
Summary
Implementing File Integrity Monitoring (FIM) is one of the most effective ways to secure your endpoints against unauthorized changes, malware deployment, and unexpected configuration drift. By leveraging Wazuh’s native syscheck engine, we successfully built a real-time file auditing system with minimal configuration.
👉 Looking for the complete setup? Check out the Wazuh Installation and Agent Deployment Guide
File Integrity Monitoring
Created by: NAVAL KISHOR V

NAVAL KISHOR V
CEH v13 Bsc.Computer Science