
Wazuh Active Response Tutorial: Real-Time File Monitoring and Deletion
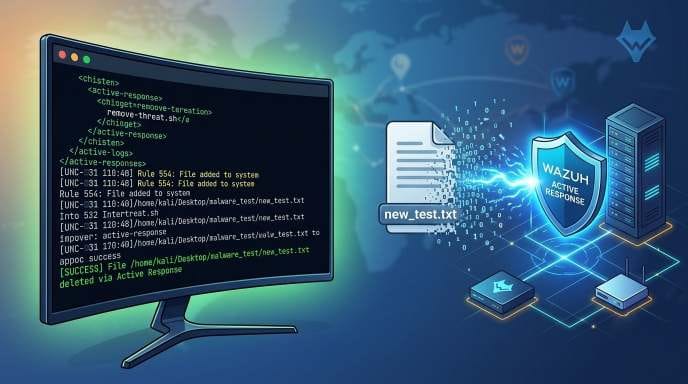
Wazuh Active Response
In this hands-on guide, we will step inside the security lab to build a completely automated, local active defense pipeline using Wazuh. You will learn how to configure the Wazuh Agent's File Integrity Monitoring (FIM) engine to watch critical directories in real-time. More importantly, we will bypass standard cloud-lookup delays and engineer a custom local Active Response script that intercepts newly added files the exact millisecond they land, shredding potential threats instantly
What We Will Cover:
Configuring Wazuh's Real-Time File Integrity Monitoring (FIM).
Monitoring security triggers via the Wazuh Dashboard.
Writing a custom local Active Response bash script to parse event data.
Executing live validation testing with dummy test strings.
Step 1: Open the Wazuh Configuration Editor
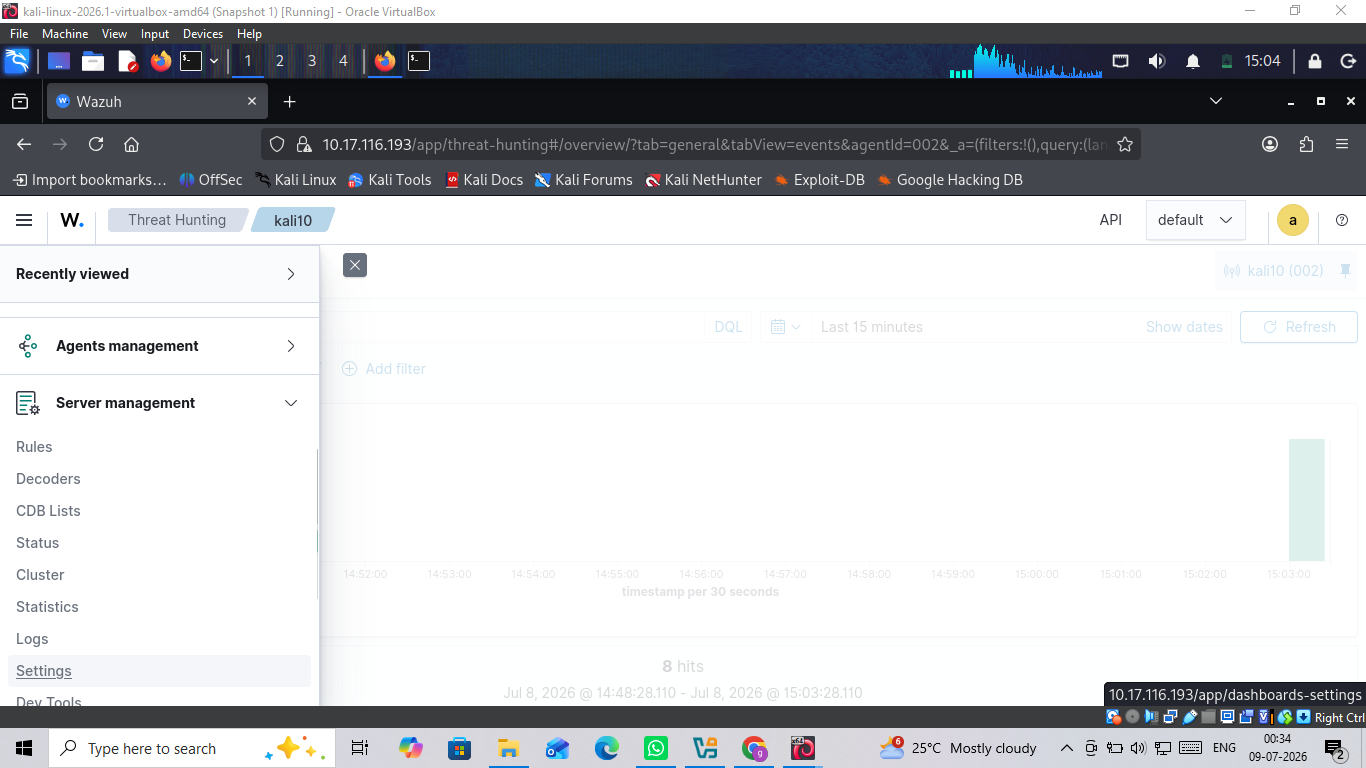
To configure our active response rule, navigate to the main menu on the left side of your Wazuh dashboard and follow these quick steps:
Click on Server management to expand the dropdown menu.
Select Settings from the list.
This will open the settings panel where you can access the global manager configuration file (
ossec.conf).
Step 2: Edit the Manager Configuration
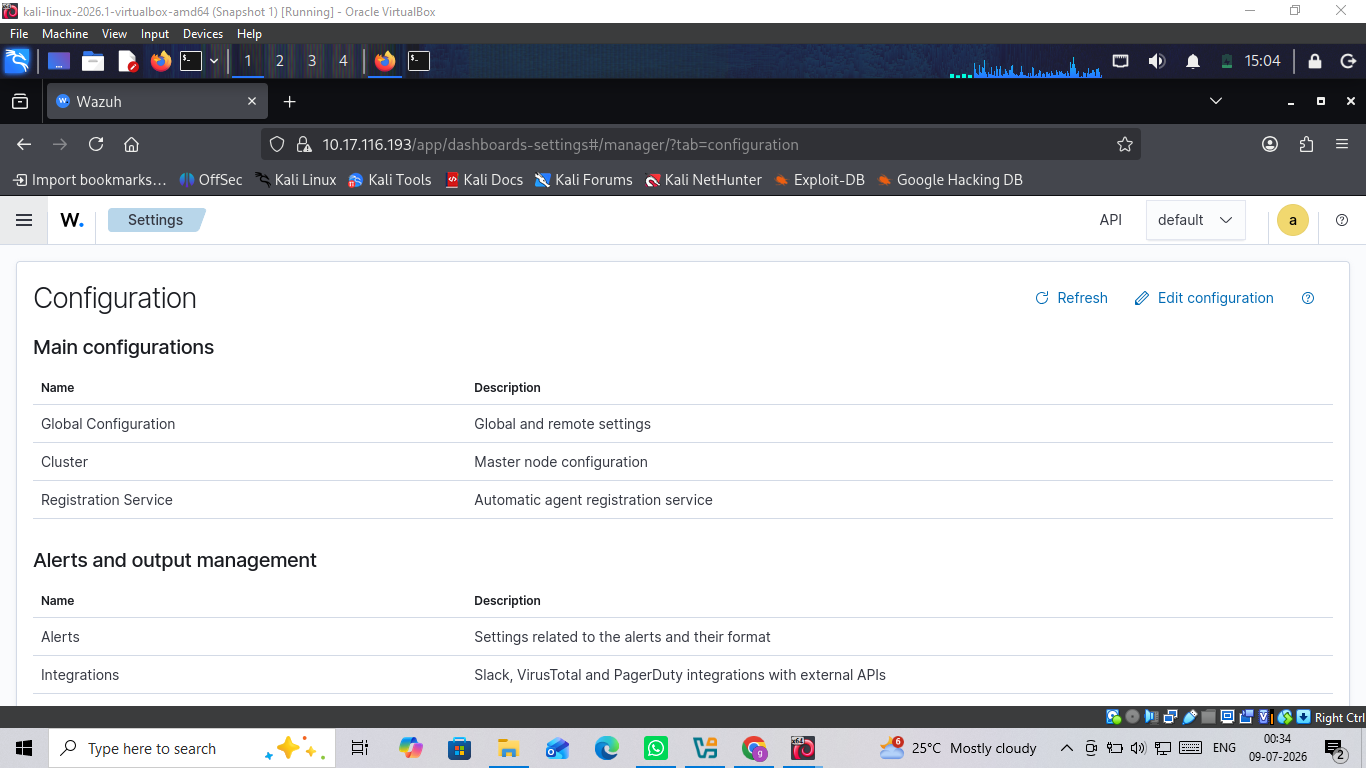
Once inside the Settings view, you need to open the raw XML configuration file:
Look at the top right corner of the Configuration section.
Click on the Edit configuration button.
This will launch the interactive text editor containing your manager's central
ossec.confsettings.
Step 3: Add the Active Response Rule Block
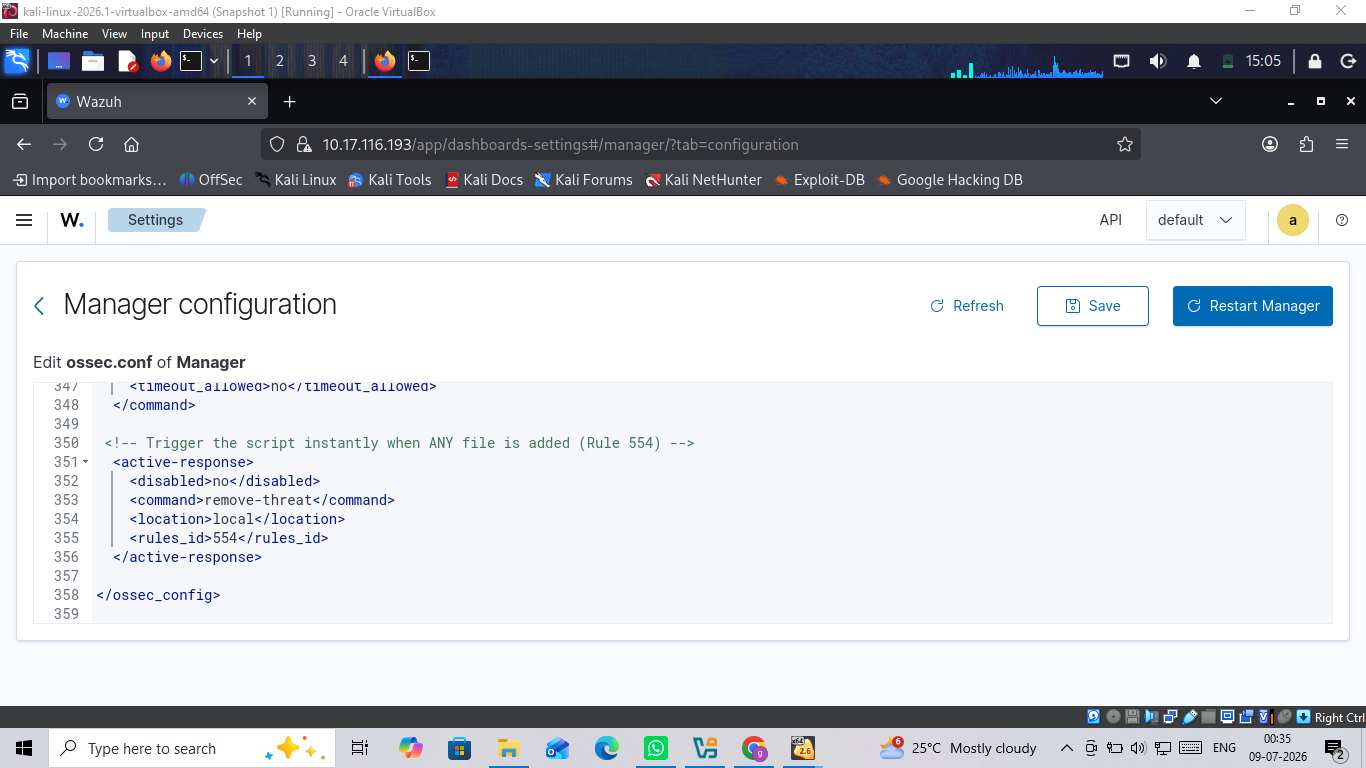
Now, paste the configuration block that links file addition events directly to your local response script:
Scroll down to the very bottom of the interactive text editor window.
Just above the final
</ossec_config>tag, insert the following XML block:
<!-- Trigger the script instantly when ANY file is added (Rule 554) -->
<active-response>
  <disabled>no</disabled>
  <command>remove-threat</command>
  <location>local</location>
  <rules_id>554</rules_id>
</active-response>
Click the Save button, then click Restart Manager to apply your changes instantly.
Step 4: Restart the Agent and Generate a Test Alert
With the Wazuh Manager updated, switch back to your Kali Linux terminal to reload the agent engine and deploy your test payload
Restart the local endpoint monitor daemon by executing:
sudo systemctl restart wazuh-agentDrop a brand-new dummy file into your monitored directory to trigger the automation pipeline instantly
echo "Fresh test run for the active response script" > ~/Desktop/malware_test/new_test.txt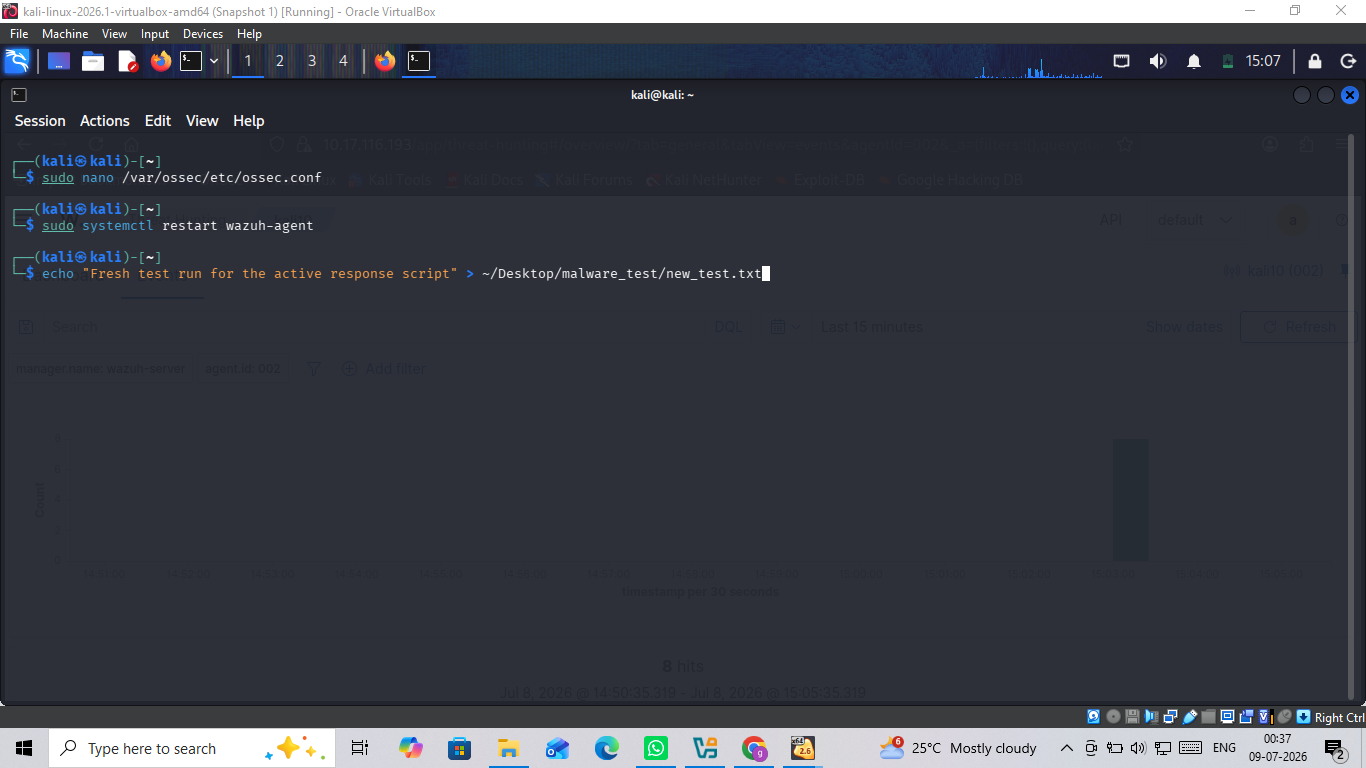
Step 5: Verify Automated File Deletion
Verify that the local automated defense pipeline caught the newly added file and executed successfully:
Immediately list the contents of your monitored directory by running
ls -l ~/Desktop/malware_test/The terminal output returns total 0
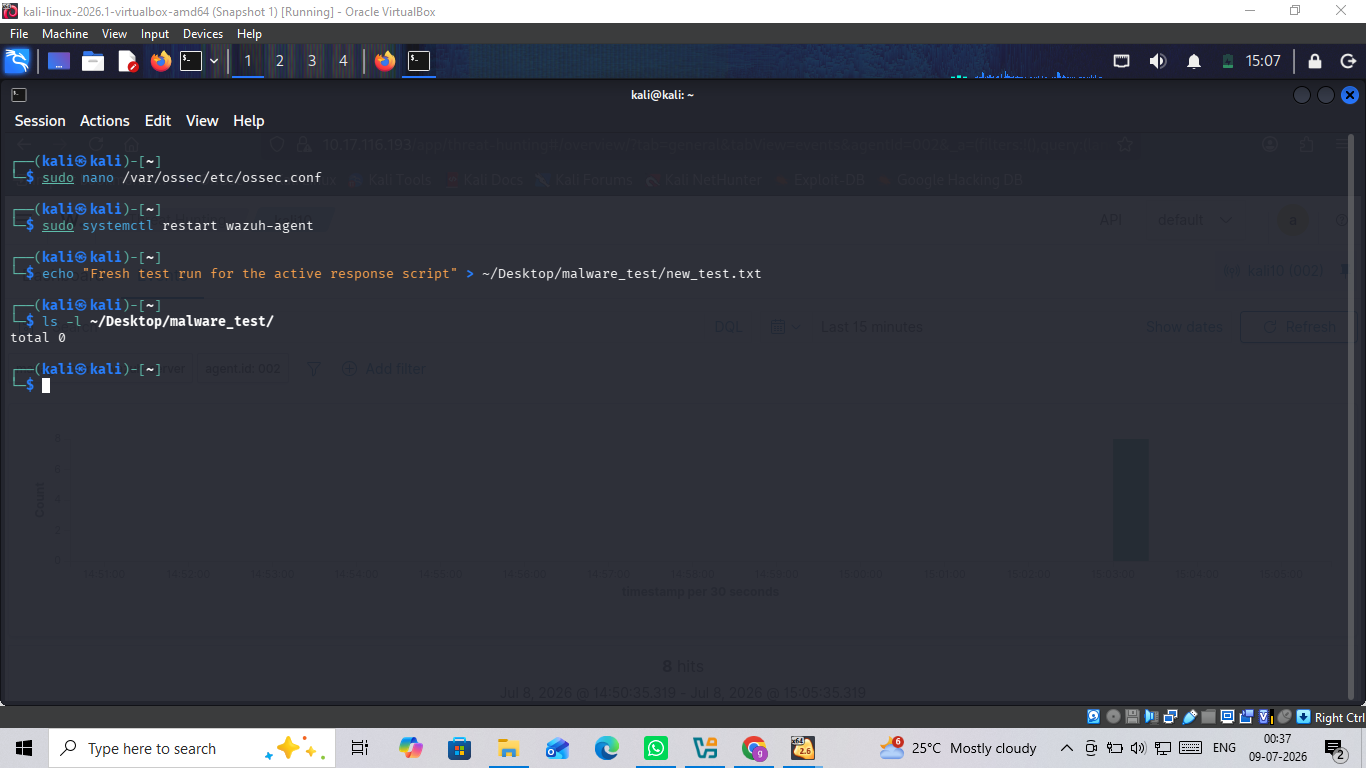
The file new_test.txt has completely vanished from the directory. The automated Active Response script successfully intercepted the event and wiped out the file within a fraction of a second of its creation!
Step 6: Check the Alerts on the Wazuh Dashboard
The final step is to verify that the entire sequence was successfully monitored and logged by the SIEM:
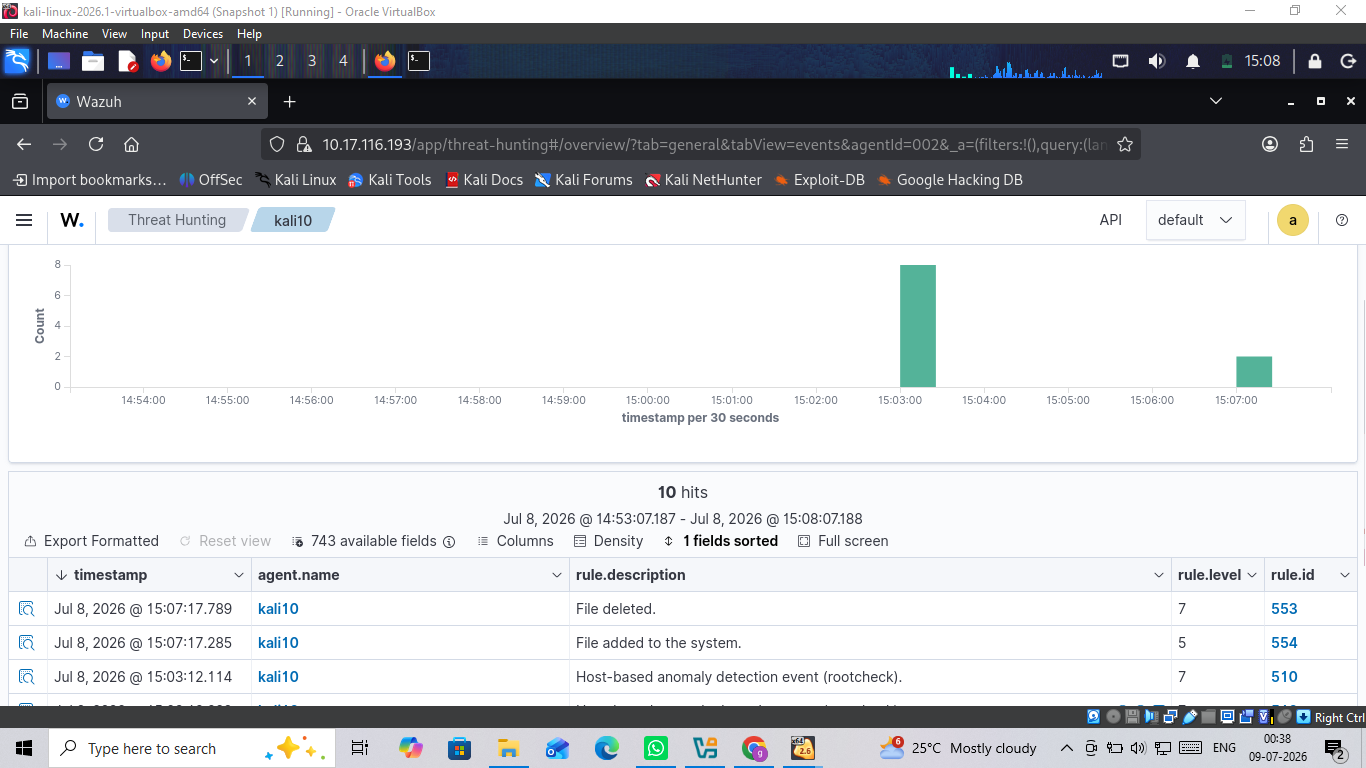
Head back to your browser window and refresh the Wazuh Dashboard under the Threat Hunting view.
Look at the timestamp log table at the bottom. You will see a perfect chronological sequence of the automated defense action:
Rule 554 (File added to the system): Triggers the exact millisecond
new_test.txthits the directory.Rule 553 (File deleted): Follows immediately right after, confirming that your custom script executed successfully and shredded the file.
Step 7: Confirm Execution via Active Response Logs
The absolute final proof of execution lives inside the local agent's backend ledger. To view the raw validation timestamp:
Return to your Kali Linux terminal and read the trailing lines of the active response log file:
sudo tail -n 5 /var/ossec/logs/active-responses.logLook at the last entry matching your execution time. You will see an explicit confirmation string stating:
... active-response/bin/remove-threat.sh: Directly removed newly added file: /home/kali/Desktop/malware_test/new_test.txt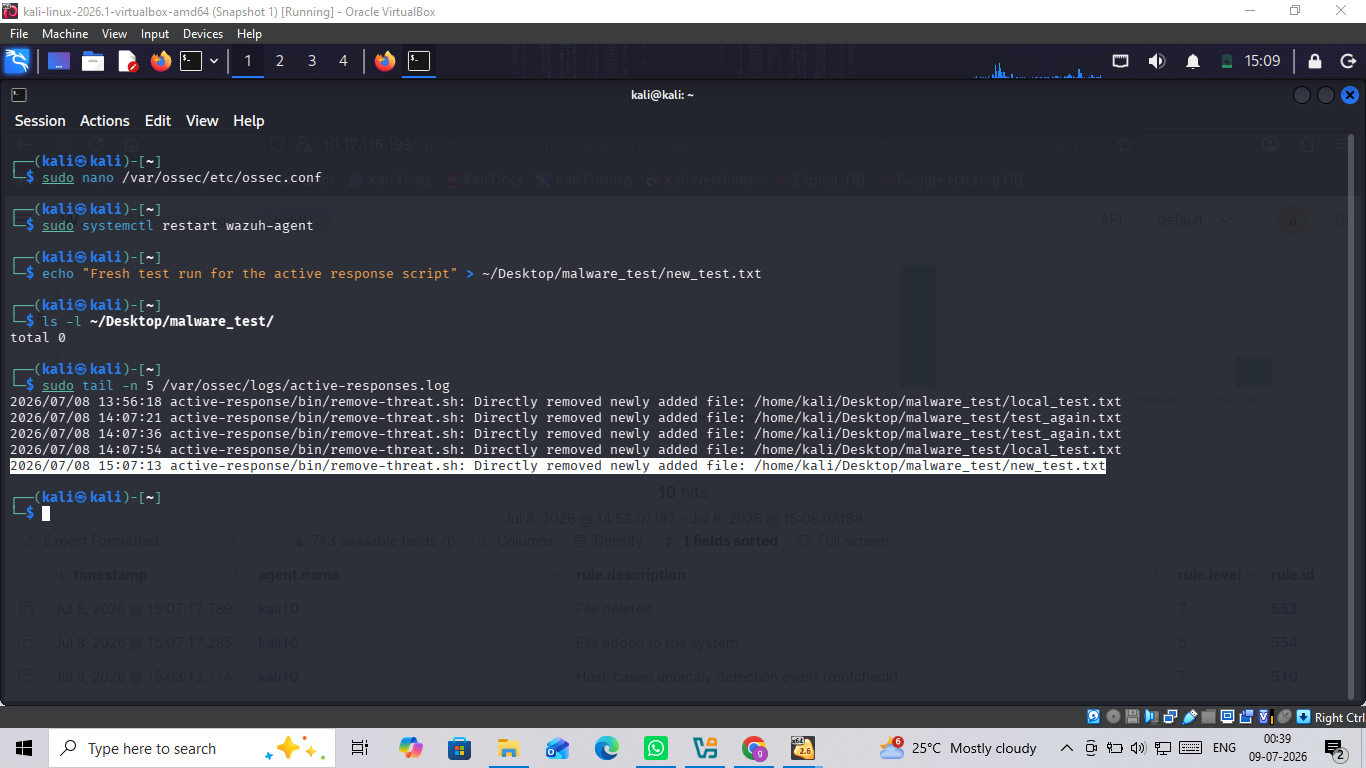
This solidifies that the custom automated defense script ran perfectly end-to-end on the local endpoint!
Summary: The Power of Automated Mitigation
Building a reactive security architecture is no longer enough to protect modern endpoints. By combining Wazuh’s real-time File Integrity Monitoring (FIM) with a custom Active Response engine, we transformed a passive alert generator into a proactive, automated defense mechanism
👉 Want to catch up on the full lab setup? Check out my previous step-by-step guides:
Wazuh Installation and Agent Connection Guide — Connect your endpoints to the central SIEM manager.
Wazuh File Integrity Monitoring (FIM) Guide — Configure real-time directory monitoring rules.
Created by: NAVAL KISHOR V